Reviews - Spring/Summer/Autumn 2021 - Fascinating Tech Magazine
Main menu:
Reviews - Spring/Summer/Autumn 2021
Older Issues > Spring/Summer/Autumn 2021
In this issue:
- The cover review - E-Trends Fly E-Bike
- Peter's Reviews - Tech for learning - Build your own telescope and learn with sphero
- Garry's Smarthome review - automate your home with Shelly and an amazing curtain automating robot from SwitchBot
- Ruth's Review - Nanit Baby Monitor will it give a parent a sense of security a colour sensor to solve the issue what colour did I pain that wall. Also a quick look at MyFirst Sketch Pad (full review to follow)
E-Trend Fly E-Bike


At just under £700 our cover featured review item is one of the cheapest E-Bikes you can buy which makes it even more remarkable that it is also a foldable bike. Combining an E-Bike with a folding mechanism is an impressive feat of engineering.
The fold is really easy and it is pretty comparable to some of the more expensive folding bikes out there.
The solid construction and the addition of the need for a battery do make it one of the heavier folding bikes and I'm not sure I would want to carry it too far. Having said that the folding nature does make it really easy to load in the back of a car.
As with all legal E-Bikes this gives power assist to your pedalling -the e-bike's motor is limited to 15.5mph . This can be a bit weird as if you stop peddaling and turn up the power with the twist grip the bike will slow down. This is due to the legal limits. There are a couple of modes controlled by a key (a nice touch for security) including one to allow you to push the bike when needed.
The power assist is pretty good and made going up hills a breeze. Although a steep hill we tested on did seem to drain the battery remarkably quickly but this may have just been the way the power gauge works as when we came off the hill the gauge went back up again. We would like to see a better display but at this price we won't argue too much.
We did have a few issues with the first review bike we were sent which had obviously been tested hard by other reviewers but E-Trend support was excellent and the replacement bike worked flawlessly.
The construction manual was pretty clear but there is also a really helpful video on the E-Trends site.
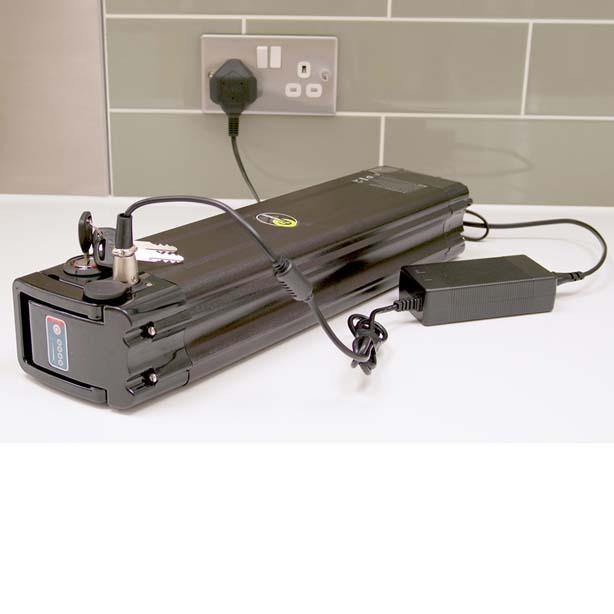
The battery is easilly detachable and could be carried say into an office to charge.

The built in led light was very bright and we liked that it was part of the bike. It has a separate button which is very easy to operate whilst riding
We found the battery lasted about 45 minutes of cycling in real-life with around 20 minutes of that being on 1 in 8 up hills but it should be remembered that this was with a 6 foot reasonbly built rider.
This height of the rider was a little bit of an issue with this bike having quite small wheels and leading to quite a high center of balance. It took a while to get our stability but it was totally possible. A slightly shorter rider found it a lot easier.
The ride was really comfortable and for a folding bike this was remarkably practicle method of transport.
Over all we really liked this bike and for the money you definitely cannot argue.
Highly recommmended.
 Telescope Kit
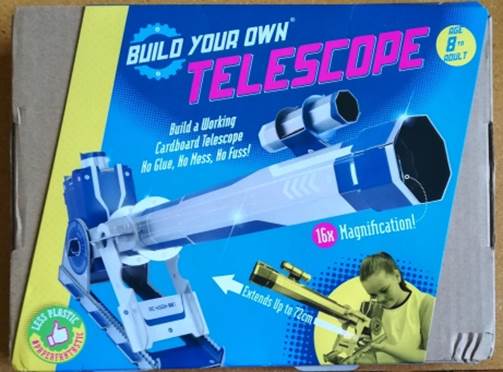
“Build Your Own” is part of Paper Engine Ltd and specialises in making environmentally friendly children’s construction kits using cardboard and paper while restricting the use of plastics to the minimum. This particular kit is plastic free and no glue is required in the construction.
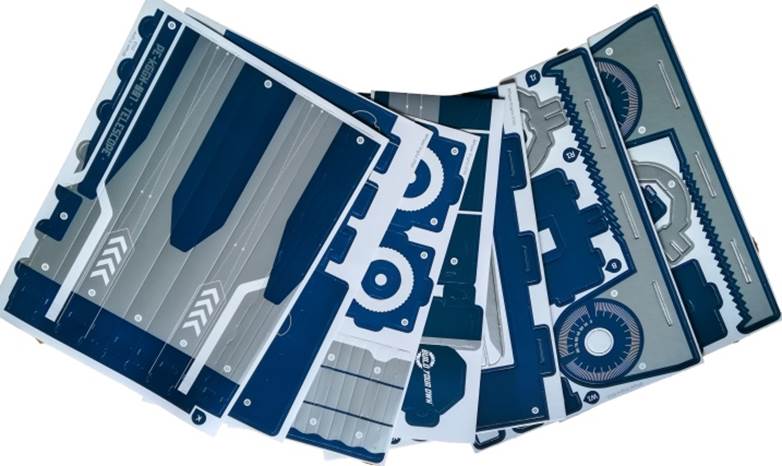
The telescope kit came packed in a simple cardboard container wrapped in a colourful sleeve which contained an instruction sheet, the sheets of card and an envelope containing two glass lenses and a mirror. The instructions included a link to the Build Your Own website where detailed video instructions are available.
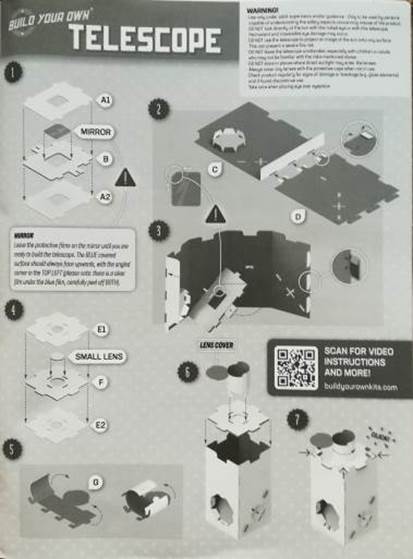
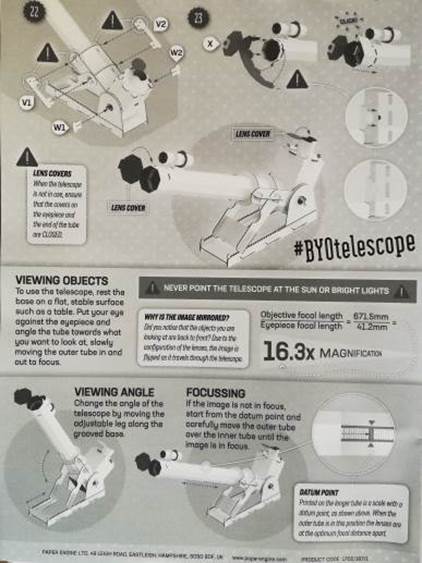
I decided to construct the telescope just using the instructions included in the box and noted that while the part numbers are clearly marked on the sheets they are not marked on the actual parts. However with just 32 parts this should not be a problem.

The age range for this product is given as 8 years to adult but I felt that a younger child would need some adult assistance with some of the steps in the construction. Certainly the first few steps which involve locating the mirror assembly are particularly fiddly.
Construction from then on is straight forward with the instructions clear to follow especially if the on-line video instructions have been viewed. Initially it all feels flimsy but adding the later pieces which use thick card transforms the model into a surprisingly rigid and robust Telescope.
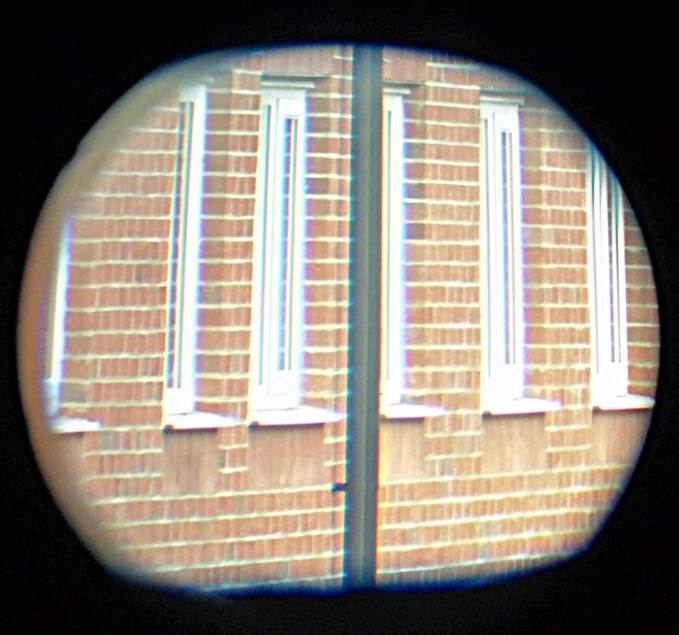
But can this telescope made out of cardboard actually work; well to my surprise it produced a quite acceptable image. The image is back to front and has a magnification of 16.3X.
The magnified image shown was taken using the camera on a standard smart phone placed against the eyepiece.
The Build Your Own Telescope Kit has much to offer children over a range of ages. From the basic building of the telescope which requires finding the correct parts and understanding how they fit together along with the need for concentration and manual dexterity to complete the task. The child then has the satisfaction that comes from completing the construction and seeing the magnified image through the telescope. Older children can also gain an understanding of how a telescope works with the path taken by light through the telescope marked on the model.
Priced at just £19.99 direct from www.buildyourownkits.com this fun and educational toy is good value for money and highly recommended.
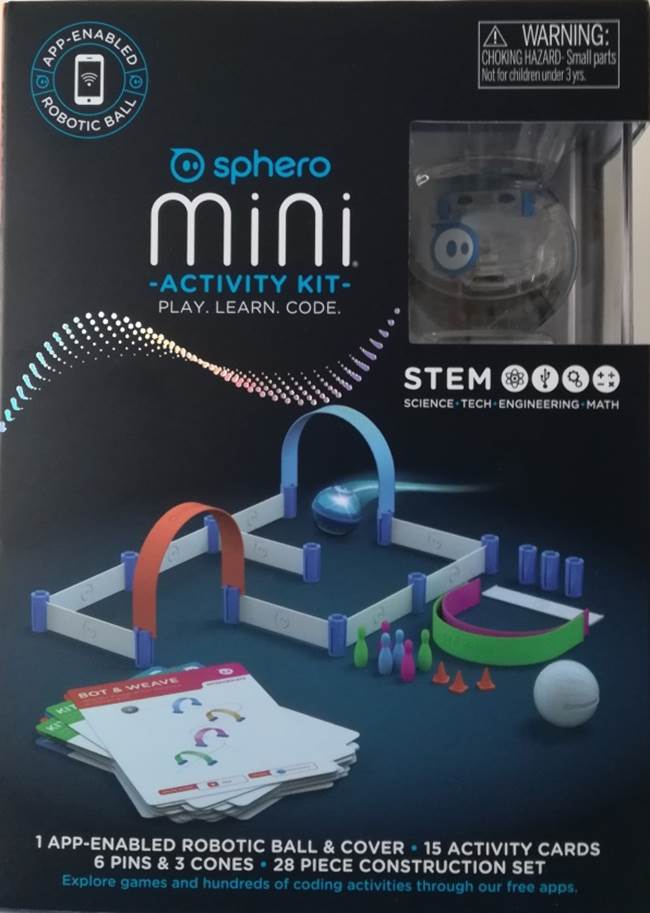
Sphero Mini Activity Kit
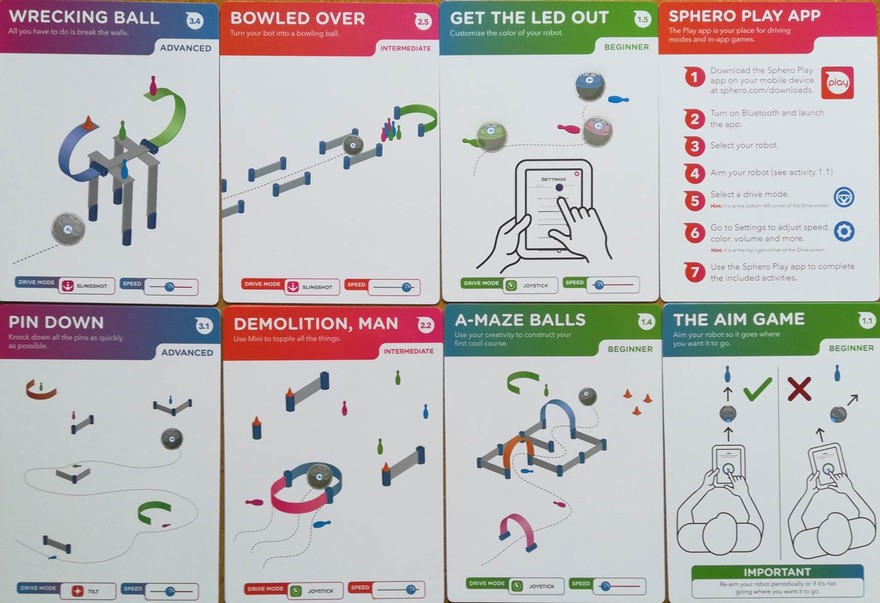
Sphero Inc. is a robotics and toy company based in the USA who manufacture a series of robotic balls that can be moved around under the control of an app on a smart phone or tablet. The product under review is the Sphero Mini Activity Kit which consists of a Sphero Mini robotic ball along with 15 activity cards and a 28 piece construction set which can be used to set courses to manoeuvre the ball through.
At the time of writing the activity kit is priced at £75.99 on Amazon while the Mini ball on its own is £49.99.
Two apps are available to control the ball, the Sphero Play App which is suited to the younger age range and the Sphero Edu app which teaches how to move the ball by writing computer code.
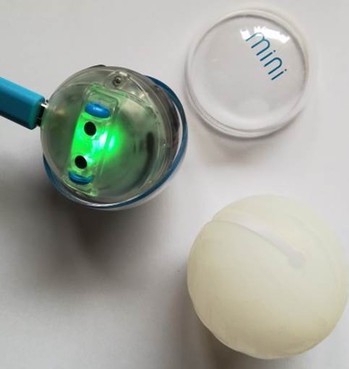
The Sphero Mini is approximately the size of a golf ball and consists of a transparent shell that contains the device. The shell can be split to allow access to the USB charging socket. A silicon shell can be fitted around the mini to provide additional protection or to improve traction. Once the mini has been charged and the apps downloaded to a compatible smart phone or tablet a Bluetooth connection can be established between the phone and Mini simply by bringing the two devices in close proximity. Details of compatible devices along with other useful advice to get you started can be found on the Sphero website.
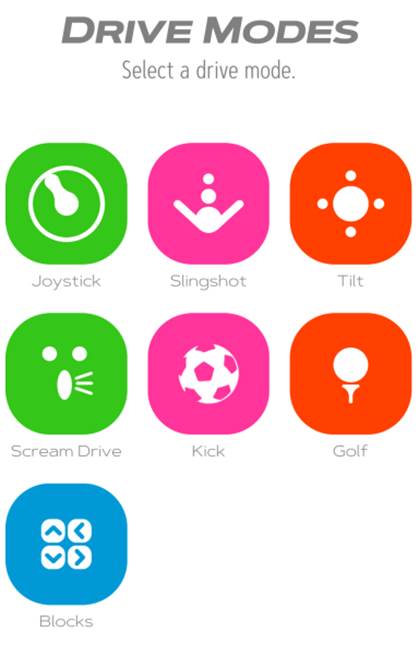
Using the Sphero Play App gives a number of ways of moving the ball from simply sliding a finger on the phone screen to various flicks or tilting of the handset. There is a simple system to orientate the ball to align with the phone screen.
The activity cards present a series of challenges using the construction kit to build routes of
increasing difficulty around which the mini must be manoeuvred using the specified control method.
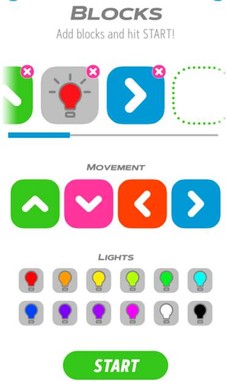
The blocks screen introduces the concept of controlling the mini by arranging a series of blocks each of which will indicate a direction or a colour before starting to use the Sphero Edu App.
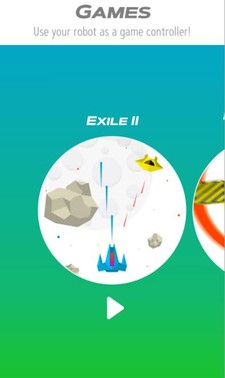
The Play App does also include some arcade style games for which the mini ball can be used as a games controller.
Connecting the Mini to Sphero Edu App introduces learners to the world of coding, starting at the simplest level of drawing a path on the screen through to creating programmes using scratch blocks to learn more advanced logic and finally to text programming using JavaScript. The lessons are well explained, some with the help of video examples There are many practice examples to ensure that concept is understood before moving on to the next lesson. Logging on to the app allows the user to create a workbook in which their completed work can be stored as they progress through the lessons.
The programming blocks are divided into eleven coloured categories according to the types of functions that they perform.
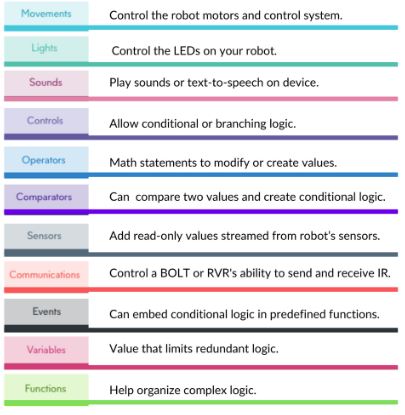
The individual blocks appear within their appropriate category along the bottom of the programming canvas from where they can built into the programme as required
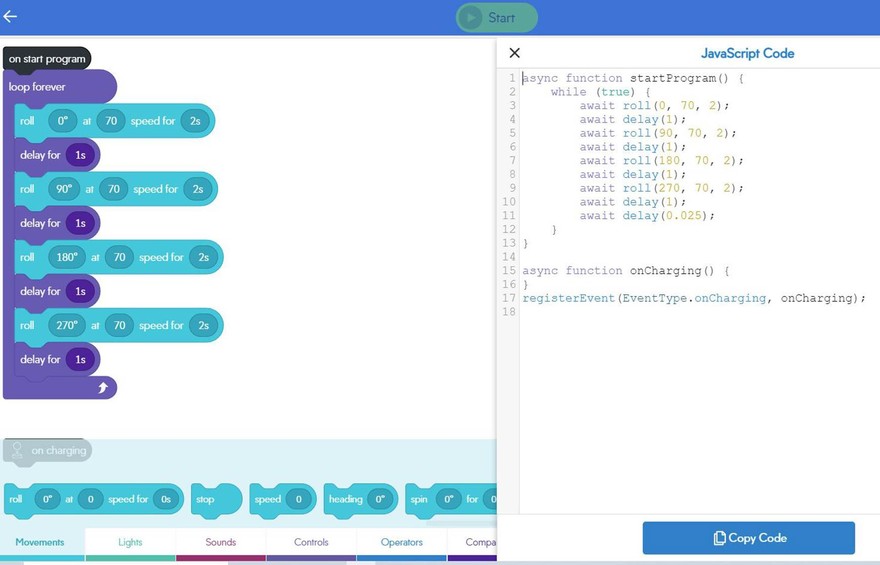
The programming canvas showing the block code to move the mini on a square path.
There is also a drop down menu which gives you the choice of seeing the actual JavaScript that is sent by Bluetooth to the mini to control its movement or to see additional help with the block canvas.
The Sphero Mini Activity Kit is a brilliant educational package that has much to offer over a very wide age range. Coupled with the Sphero play app a child will learn how to assemble the various components to build a course to manoeuvre the mini around as well as developing the fine motor skills needed to gain precise control of the device.
For older learners the Sphero Edu app will work equally well in an individual or group based environment. Having the mini ball to provide immediate feedback to the result of any programme turns what could be a boring subject into something exciting and challenging.
The Sphero.com website contains extensive help information but there is also a support help line available via email and live chat.
Apart from an initial hiccup when I failed to check that I was using a compatible phone, I found the robotic ball easy to make a Bluetooth connection to a phone and both apps worked exactly as intended.
I would have no hesitation in recommended the Sphero Mini Activity Kit as an excellent education product for users over a wide age range.
TrulyFascinating Award Winner
Garry’s Smart home
In this issue we look at two very different smart home suppliers who both can add real value to your home.
Shelly
The first is Shelly. Shelly supply a plethora of home automation devices that work over Wi-Fi. Everything from controllable relays that can fit behind switches to flood sensors.
Normally wifi based sensors have an Achilles heal in their battery life but Shelly have obviously worked some kind of magic here. For example, the flood sensor is claimed to last 18 months. We have had these on long term test to see how these claims stack up and have to say we are impressed. Ours has been running for 7 months now and is still showing over 3/4s of battery remaining.
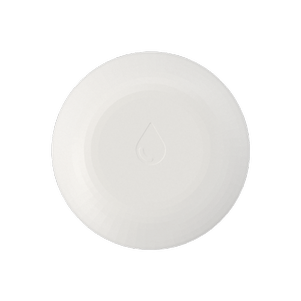
Talking about the flood sensor we love the aesthetic of this white pebble like unit. It definitely doesn’t stick out like some water sensors do. We also love that it can be put in a non-alarming mode to allow rain detection for example.
The range of behind socket dimmers and relays Shelly have is amazing. For the UK market they are working on devices that do not need a neutral wire but they weren’t available for our review which meant testing any lighting control was difficult as most of our switches do not have neutral. When used inline to control a lamp though they worked really well. What we really liked is that they have a range of dual relays and dimmers making really good use of space.
We think these are probably based on one of the ESP chipsets popular with Hobbyists for WiFi projects which means that there are a number of alternative firmwares out there for them including Tasmoto which seems really popular these days.
Having said that the built in firmware works really well and has links to all the services you could want including Alexa, Google, Smartthings and IFTTT.
We did find the setup in the app a little confusing around adding a device but once you do one it is easy to repeat and there is a lot of video and document guidance online.
The best thing is the cost. Compared to a lot of smart home devices these are very reasonable. The Flood Sensor can be bought in the UK for less than £25 for instance
The other thing we like is the reliability. These things just work and work and work.
We really like the Shelly ecosystem and if you are interested in a hub-less Wi-Fi based system we would highly recommend taking a look.
The next thing I want to talk about is the
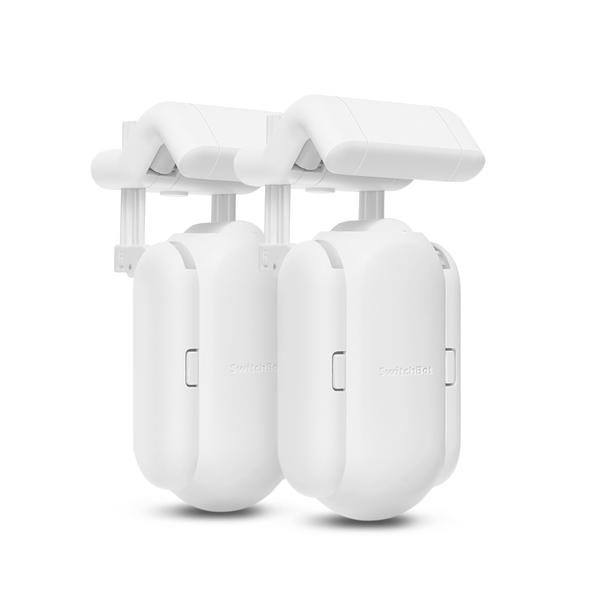
SwitchBot curtain system.
Let us say straight out of the gate we love these things but there are some caveats for use in the UK.
Now some would say automating curtains is the ultimate in laziness and they are probably right but my article on automating curtains on the cheap a few issues back is still one of our most popular articles so a lot of people must want to be that lazy! In all seriousness there are very good reasons why you may want to automate curtains. For warmer climates (or those few blistering days of a British summer) being able to close or partially close curtains when the sun is bright can help with cooling costs. Also being able to have curtains opened and closed on timers can help deter thieves for unoccupied properties.
Of course, you may just want to have the curtains open automatically to wake you (or perhaps a family member) up.
Whatever you want to do this for automating curtains has historically meant replacing your current curtain poles/tracks with special powered ones. The SwitchBot system is designed to work with your existing poles and tracks. It comes in 3 varieties for Pole, U-Rail and I-Rail. Now one caveat here is that when we originally received the review kit early this year the u-rail version only fitted very specific measurements and these wrelarger than most of the common tracks used in the UK – the very common Swish for example. We actually had to change one of our tracks to test the U-Rail system. The good news is the cheapest rail system sold in B and Q worked extremely well. The even better news is Switchbot listened to these concerns and the U-Rail system now comes with loads of accessories to fit most existing systems. There is even a handy measuring system to work out which accessory you need to use.
The pole version system worked a treat with our existing poles from day one though.
The system consists of one or two what we would call curtain robots. They clip between the first two hooks on you curtain rail and have a powered wheel that drives along the rail pulling the curtain with it
Now we did read that some people had issues with particularly heavy curtains, but we didn’t seem to have any problem with quite heavy lined curtains with an additional black out curtain.
Set up was really easy with very clear instructions in the app. Again a UK caveat here we originally had to follow the alternative instructions for fitting the U-Rail even with the B and Q rails as we had to feed the robot into the groove from the ends rather than hooking in and twisting as shown in most of the promotional videos. Nevertheless, this works well. With the new accessories we could have twist fitted however but actually it wasn't an issue to fit from the end.
You can fit one or two of the curtain robots depending on your curtain configuration. If your curtains open from the middle as is common in the UK, then you will need one robot for each side. Again, this is explained well in the app instructions.
Depending on your setup you may need to install some extra parts. For example, if your pole has a join SwitchBot supply a wrap for the join to allow the robot to traverse it easier. We found all our joins were in the centre of our curtains and didn’t impact movement of the robots so didn’t need them
Once installed the app will guide you through calibrating the opening and closing positions. We did find on our long-term test we had to do this again after a few weeks as they had drifted slightly.
You can also choose the speed of opening or closing with a lower speed mode that is supposed to be quieter. To be honest we thought this sounded worse and the gentle whirr of the normal speed is surprisingly reassuring anyway.
Control is via the app or you can optionally connect a SwitchBot remote – we thought the design of this little button was brilliant and would recommend having one for the app-phobic in the household. If they are also button phobic there is a mode where the curtain will open or shut at a tug - we did find this slightly too sensitive as it would often open when reaching through the curtains to open or shut a window. You can always turn this off though.
You can also connect to service like Alexa, Google Nest and IFTTT but not directly from the curtain robots. For this you will need another addition a SwitchBot Hub. This basically links any SwitchBot devices you have to your home network. The one we had, the mini-hub, also doubles as a IR remote so you could for example use it to control your TV or Airconditioning (if it had a remote).
This latter is pretty cool, no pun intended, as you can use it in automations linked with the curtains and yet another optional extra the temperature/humidity gauge. Again, we love the design of this device very small and discrete. So, say the temperature in your room is going up you could first try closing the curtains partially and if that failed then turn the aircon on.
The hub works very solidly and the integrations with one exception are good. The exception initially was SmartThings where the curtain was shown open when closed and vice versa. Control in SmartThings wasalso bizarre with telling the curtains to go to 0% causes them to open then close. Amazingly Swtchbot fixed this withing a couple of days of use reporting and they now work exactly as expected. Switchbot's support seems to be second to none.
Another extra, which can help with heat management, also serves another purpose, well its main purpose, to charge the curtain robots. Each robot has a rechargeable battery designed to last several months (ours have now been in 7 months and the one without a solar panel just needed recharging). This can be recharged using any USB adapter (not supplied) or the other extra a solar panel. The design on these is superb. When you first get them they have a usb plug sticking out the back that neatly plugs into the back of the curtain robot. It looks very tidy but in our case we realised the panel would be mostly obscured by the top of the window. Fear not as it turns out that this plug is on the end of a long usb cable neatly tucked into the panel and there is Velcro supplied to attach the solar panel wherever you want. One caveat here throughout the winter and spring we have tested in the panel has never reached the level of illumination it says it needs to charge.
How do we know this latter? Well the panel has a light sensor built in and there is an experimental feature allowing you to use this to automate the opening and closing of the curtains. Again, this may not be much use in the UK as the level seemed to rarely vary from what it showed overnight. Hopefully SwitchBot may recalibrate this. One good thing with this automation is it doesn’t need a hub.
All in all this system is really well thought through, reasonably priced, even if you want all the extras, and a doddle to install. We love it but have to flag the caveats for the UK market. If you have a compatible curtain rail or pole then it is a no brainer if you want automation. Very highly recommended and would win our TrulyFascinating award if not for the issues with the Solar Panel light sensor.
Nanit Baby Monitor
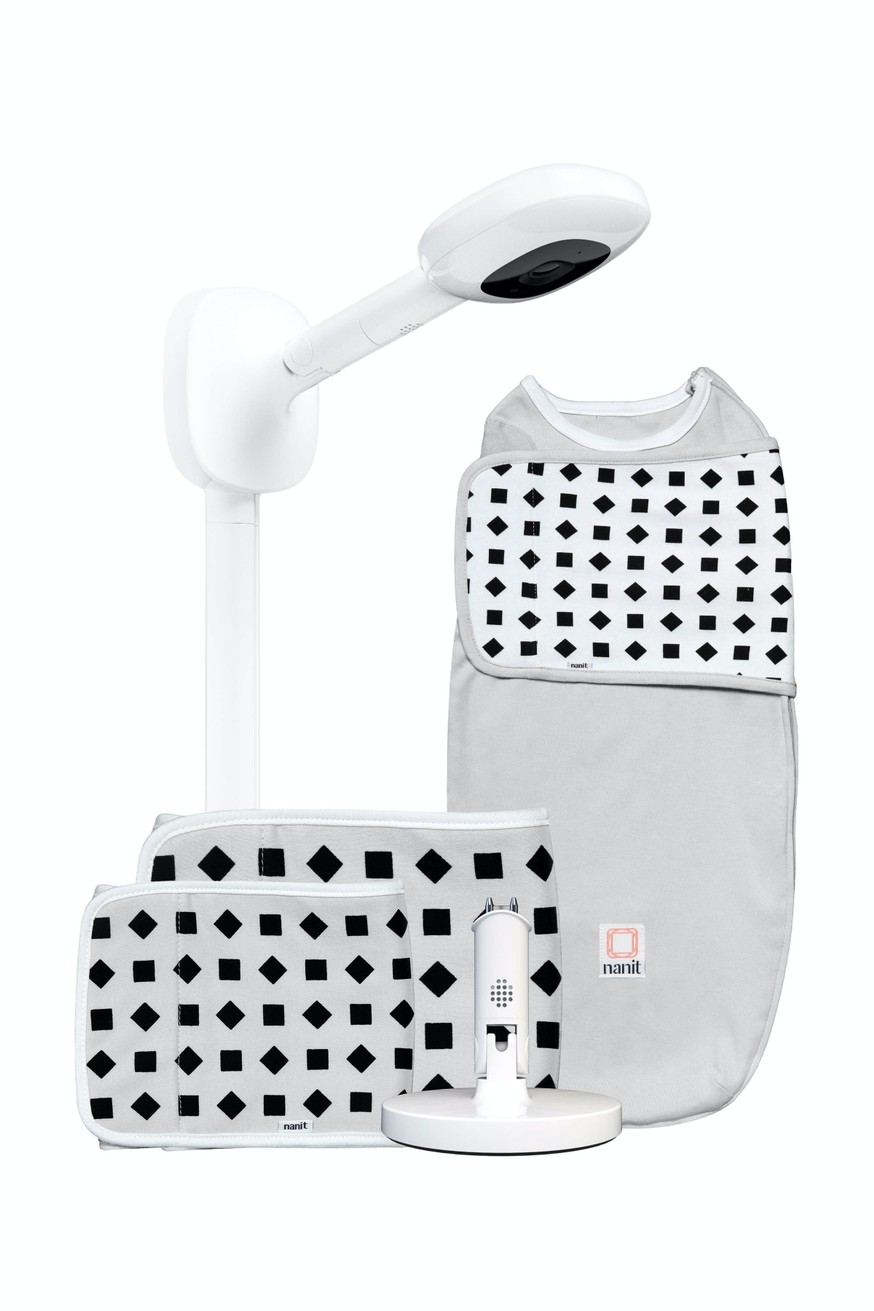
This is a camera on a stand that give you an arial view of the cot. If you add the sleeping bag or swaddle option or wrap then you can monitor your baby’s movements and breathing overnight.
It has an advantage in that your baby is less likely to reach and interfere with this camera as it is out of their reach. The disadvantage is that it needs a wide base in order to balance so this may mean you need to move your cot out from the wall so the drawer still fits under.
Set up
This was very straight forward by following the instruction in the app. It does use Americanisms such as ‘Mom’ .
The breathing monitor is a fabric pattern to track for movement and breathing. This is an advantage as the lack of technology in the monitor makes it easy to wash. The choice between a swaddle, sleeping bag and a wrap allow you to adapt as your child grows. The breathing monitor is quite cute in the app the way it shows a breathing set of lungs.
The app gives details like how long your baby has slept and how many times you have interacted with them.
It provides a summary of overnight and daytime sleep so you can see how your baby in progressing.
You get a summary of hi-lights such as the longest your baby has slept and helpful tips based on your baby’s age. Then the app selects memories that you can send to friends and family by downloading the video.
The app gives you the temperature and humidity in the room. It tells you what time your baby went down and when they actually fell asleep. Handy if parents work shifts and swap over to know how much sleep the little ones need.
You get alerts if motion or sound is detected on your baby’s cot so you can decide if you need to act on them or you can just watch live on the camera to see if your baby can resettle themselves.
The over cot view is preferable to some of the side of cot views that other cameras offer.
It is possible to get a Nanit Multi-Stand Baby Monitor Accessory which you can then use for when you are travelling to get a view of the whole baby room and it can be used as a nanny cam. It will widen the angle automatically when connected to the multi stand.
It can remember the last 10 wifi it has been connected to so useful if your baby regularly stays with family and friends.
Conclusion
Easy to set up and operate the app. The over cot view is a really nice view and lower cameras just arouse the baby’s curiosity and tempt their hands and feet as they become more mobile. The breathing is a good feature to have where you have had a premature baby and have more concerns than perhaps more experienced parents.
My First SketchBook – Quick Look
The full review for this will be upcoming shortly but has been affected by our ongoing technical difficulties.
This is an LCD tablet and stylus a bit like the Boogie Board we tested previously but with one really good addition it links by Bluetooth to an App so you can save what is drawn on the pad.
Our initial tests show this works really well and we can certainly see this as a way of saving paper.
We will update this review very shortly but so far so good.
Nix Mini 2 Color Sensor
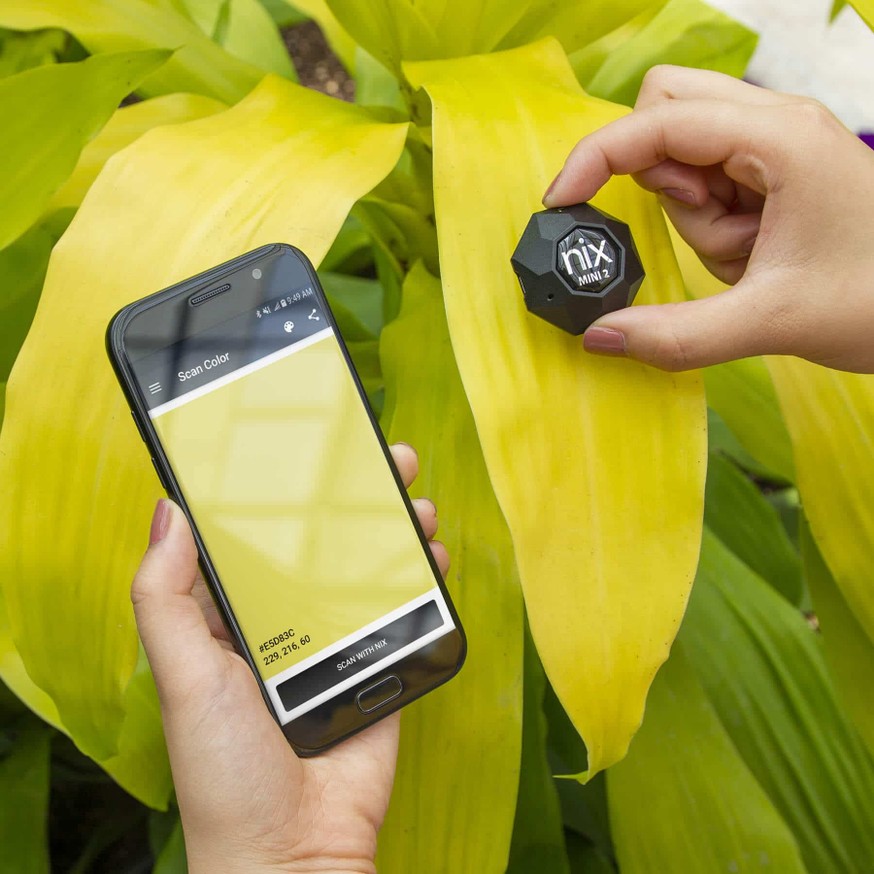
Had you ever looked at a wall seen damaged paint and thought now what an earth colour did I paint that. Whilst designed for professionsals the Nix mini is also incredibly useful in this sort of situation and will help identify the paint.
It really works. The tiny sensor is really easy to use and solves one of the main issue of other colour sensors that you could use in this situation. Previously in this sort of scenario I've tried using a phone app to take a picture of the surface in question but the matches have never been accurate as it is very difficult to properly set the white balance of the phone camera and whatever light source you are using. Because this sensor has its own light source this isn't a problem here and the results are excellent.
When used with a known paint source it gave a perfect match.
The apps are really good. I say apps as at the moment there are two one for giving the RGB colour of the source and the other the nearest paint match from a series of providers. The list of providers in the UK is slightly limited for consumer end users with mostly trade paints listed. Of course this totally makes sense for a tool mainly used in the trade. Having said that Nix are constantly looking to improve the sources.
The other improvement they are doing is looking to combine the apps into one app which will be a lot better as at the moment if you scan in one app you cannot transfer the results to the other... you have to rescan.
Other than that this is a brilliant device and highly recommended
All this issues content in one good read | ||||