Summary


With 8 "tracks" to cater for complex audio and visual set-ups but with a scalable timeline and large preview area to allow for fine tuning, Magix Photostory 2015 Deluxe does exactly what it says on the box - allowing people to 'Make moving picture stories without any previous experience'. Its key aim is to allow the user to orchestrate video and slideshows that are above the mundane. Even without prior experience of slideshow making, or Magix software specifically, the application is intuitive enough to produce output in a relatively short amount of time and without a steep learning curve. There is a wealth of templates, transitions, titling effects and audio clips to cater for most beginners needs, and with the ability to upload your own soundtracks or record audio directly onto the timeline, it should also cater for the enthusiast as well.
It's not without a few annoyances but as a start point you can't go too far wrong.
Product Details
• Software Magix Photostory 2015 Deluxe
• Version 14.0.2.51
• Website http://www.magix.com/?id=73&L=38&C=74
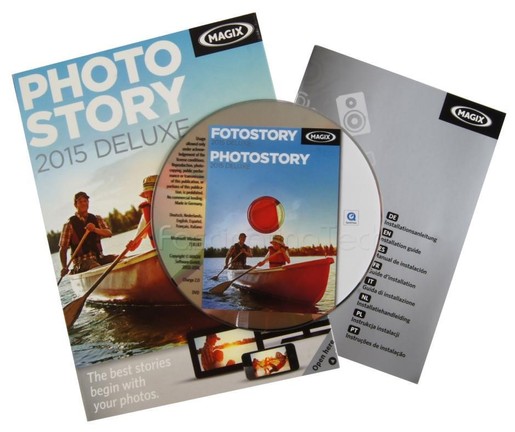
In the box
• DVD with all software
• Multilingual paper manual
• License key
Key software installed by the installer
• Magix Photostory 2015 Deluxe ~ 630 MB
• Magix Music Editor 3 ~ 85 MB
• Magix Extreme Print Studio ~ 48 MB
• Magix Photo Designer 7 ~ 30 MB
• Speed3_burnR_mxcdr_MSI ~ 20 MB
Bundled and optional, but defaulted to "Yes, install"
• Simpliclean ~ 60 MB required
Specifications & Requirements
The following is taken from the box \ website and worked well enough on my second generation i3 + 8GB RAM
Recommended Minimum Hardware (4K videos require higher specification)
• CPU 2 GHz
• RAM 2 GB
• HDD 1 GB
• Internet Required for licencing \ registration and uploads
• Can be used offline, but requires internet connection once per month to validate key
Import formats
• Video (DV-)AVI, MPEG-1/2/4, M(2)TS, MXV, MJPEG, MOV, WMV (HD)
• Audio WAV, MP3, OGG, WMA, MIDI
• Image JPEG, BMP, GIF, TIF, (& PNG)
Export formats
• Disk DVD, Blu-ray
• Video (DV-)AVI, MJPEG, MOV, MPEG-1/2/w, WMV(HD)
• Image JPEG, BMP, GIF
First impressions
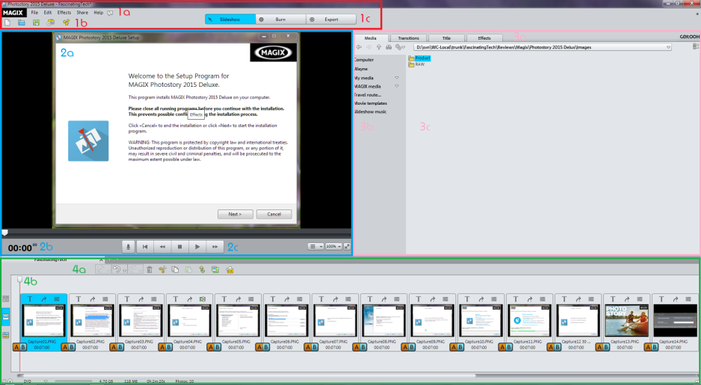
If you have used Magix software (musc maker etc...) before then the interface will look familiar. Even without prior knowledge of this type of product, the interface is simple and clean with enough space provided for each of the 4 key sections and associated menu functions \ buttons.
The software leads you through the creative process easily enough with a "Create \ Edit \ Export" approach that is expected and common for this sort of editing software.
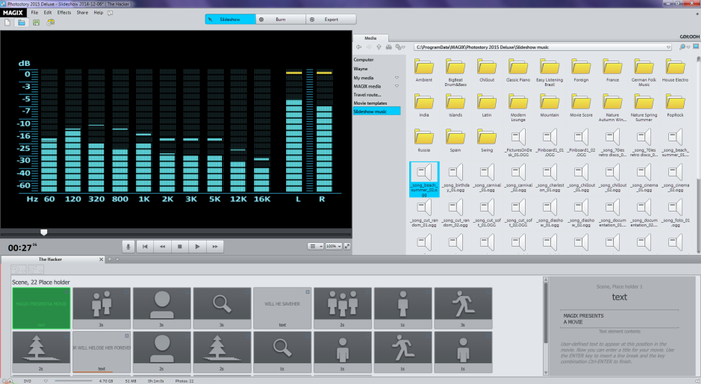
1) Quick menu - Access to common project controls
a) Menu functionsb) Sub functionsc) Edit \ Burn \ Export quick actions
2) Preview - Display the current slideshow or selected effect
a) Preview of current slide or selected transition or effectb) current time position in the slideshowc) Transport controls (Record Audio, Rewind, Stop \ Play etc...)
3) Media Selections - Drag onto timeline
a) Your media \ Inbuilt transitions \ Inbuilt Titles \ Inbuilt Effectsb) Displays a tree of the selected media - Effects are categorised into groups for ease of accessc) Contents of the selected item in (b) or input to control a selected item
4) Timeline - Your slideshow shown as an overview, a zoomed area, or a detailed timeline
a) Basic controls affecting a single slide, or the slideshow as a wholeb) The timeline - Control where to play \ pause the slideshow
Additional functions and options appear on a right click on certain elements, such as on a slide or transition, or when selecting the Edit \ Burn \ Export quick menu buttons. In addition, when certain elements are selected (such as a title) additional dialogues will be presented in the "media" section on the right of the screen, or as a pop-up.
In Use
There is a HUGE amount you can do with this tool. The default library has over:
• 850 sound effects Listed in documentation
• 50 new music pieces Listed in documentation
• 200+ transitions Calculated by counting them on the interface
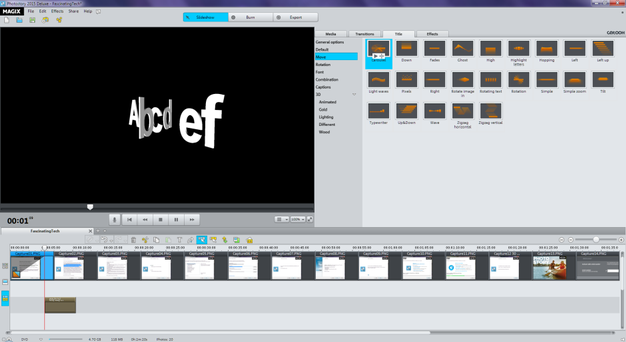
• 250+ title effects Calculated by counting them on the interface
• 800+ Effects IIntro's, templates, colour schemes, 3d themes etc...
A number of these have default values and outcomes while others can be adjusted to suite your own taste. With the included photo editing software, you can use a single set of tools for almost all of your work.
The minimum you have to do is supply the images you wish to work with and steer the product to give you an end result.
The Beginnings
#1 - Experiment - There is a WEALTH of options available and while the very useful and well written 255 page PDF manual can explain the functions and options available, nothing beats doing things yourself to get familiar with the product and process. It's always useful to have an idea of what you want to accomplish, but the wizards and help pages can prompt you if you get a creative block.
• Start small then expand to bigger things once you are comfortable with the functions
• Sometimes subtlety and finesse trumps grandiose and loud. Sometimes...
The Basics
It's very quick and easy to select and drop your photos into the timeline and manually add basic transitions and effects to them (blurs, crossovers, fades, more complex) and to add titles \ text.
• Drag a slide onto the timeline and it will snap against the previous one (or the time marker).
• Drag one slide so it overlaps another and a smooth fade in\out will be automatically applied.
• Click on the [A|B] icon on either side of the slide to choose a transition.
• Click on a transition in the right hand side of the UI to test the transition in the preview.
• Publish the end result to YouTube, Flikr, or Facebook, straight from the application.
If all else fails,
• Make use of the Wizards to start you off and get the creative juices running
• Use the pre-supplied templates to set a theme
• Publish to YouTube or burn to physical media and share.
The Intermediate
With a single or group of slides, you have the ability to
• Sharpen the images.
• Change the overall colour \ tone \ hue \ Saturation of the images.
• Change the exposure \ contrast \ gamma to suit the project.
• Apply artistic effects such as embossing, erosion, contouring, warping, kaleidoscope....
• Pan and zoom across your images during the slideshow.
• Add a 'travel route map' - ala Indiana Jones style... to set the scenes
• Create a panorama image from a number of individual images and pan across it
The Advanced
There are additional functions that allow you to:
• Create picture-in-picture collages
• Use key frames and parameters to fine tune your transitions
• Add bezier interpolations to smooth the movements of text and images
• Adjust audio track volume to fit the transitions
• Use all 8 tracks to blend multiple images, titles, transitions and audio tracks
• Remove background and hiss from audio
• Make use of a 10 track audio equalizer to enhance the sound
• Generate 'true' 3D videos for playback on compatible devices
• Export final output in a variety of formats with lots of customisation and optimisation available dependant on the format chosen.
The Good
As mentioned, this is quite a decent product - you get a lot of tools and options in one package and a pretty decent help system for when you get stuck. Most controls have keyboard short cuts (for those of us who like them) and most core functions are accessible via context sensitive mouse clicks or from the main menus.
The system is divided into Create, Burn, and Export sections which are clearly differentiated onscreen to let you know what you are doing - IE, the screens look very different, although the Export section is just a series of pop-ups displayed over the main UI.
Create
The interface is neatly laid out with clear indications on what you are trying to perform. The Preview area is a nice size by default and accurately represents what is happening at that point in the timeline. The transitions are neatly grouped together as are the captions, effects and the titling functions. The effects themselves are pretty smooth and professionally executed with blends and crossovers looking particularly nice (I like 'simple and well done').
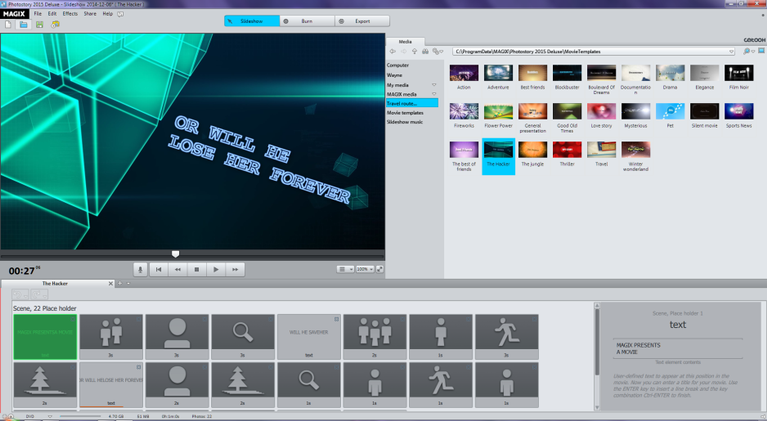
The Movie Templates are varied and well choreographed allowing the user to add in their own images and text while maintaining a well orchestrated theme.
Transitions and effects can be previewed before they are applied to the slideshow ...
... and some elements can be adjusted before saving.
The animated route tool is functional and customisable allowing the user to add in a number of waypoints and have the system animate a car, plane, a car, or walking with varying speed. This can be imported into your slideshow as a semi-transparent backdrop (on one of your 8 tracks) with the appropriate slides and titles transitioning behind it.
Music and sound effects are sometime overlooked when creating slideshows and presentations and the tool has a large library to draw on if you do not have any effects of your own.
The Useful
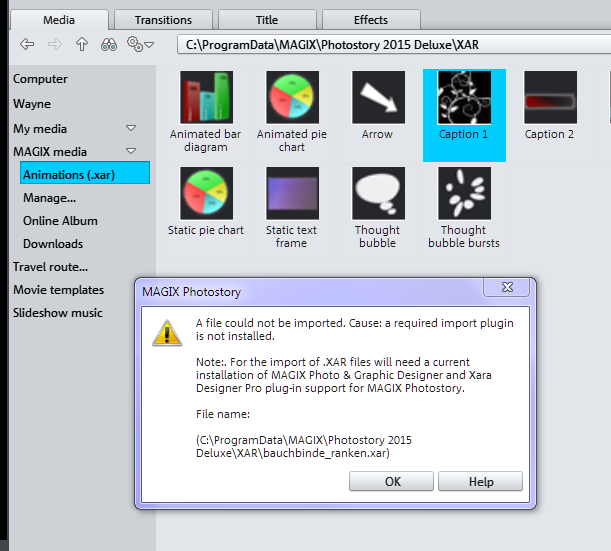
Some parts of the application are dependent on other software or products being installed. In these circumstances:
The component may be downloaded automatically ...
• When exporting to MPEG4, the codec is downloaded automatically
Or the user is taken to a web page where they can download it ...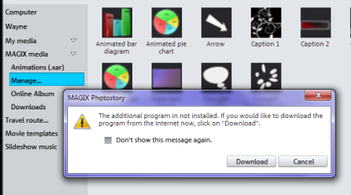

Or the system may just fail to run ...
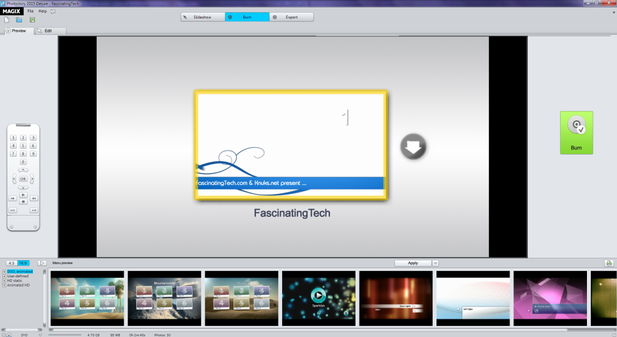
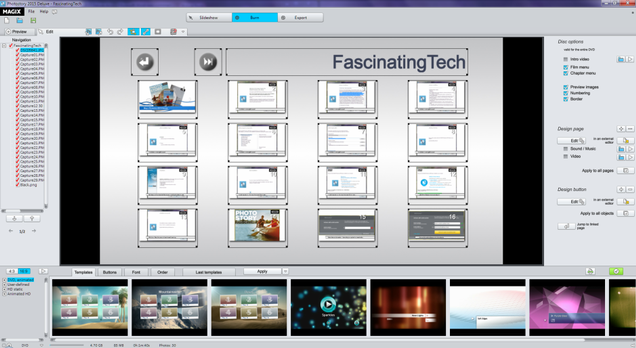
Burn to DVD
This feature has an interface all of its own with a selection of preset 'menu systems' ...
... which can be customised and changed by the user ...
This does require access to a DVD Burner which, even in 2014, some people may not have access to.
The functionality was not tested during the review so the output and manipulation \ functions cannot be reported on.
Export
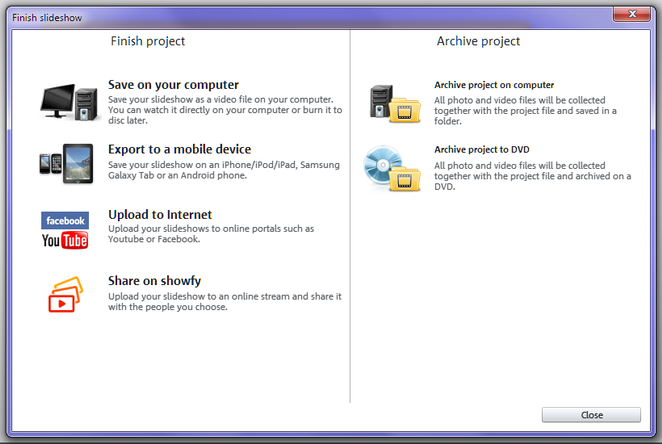
The final key option allows the user to save the final slideshow to a number of 'common' locations in a format optimised for that locale.
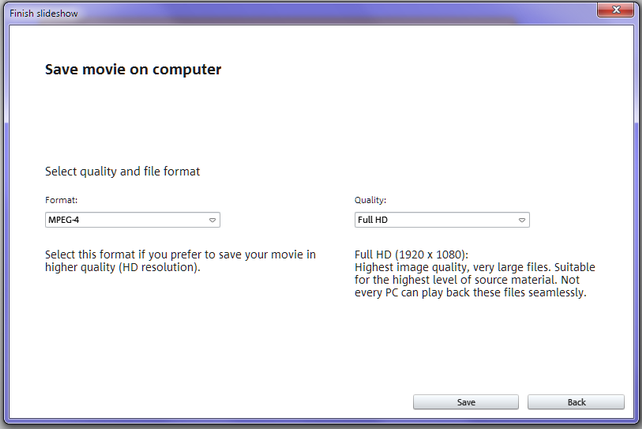
Save on your computer
This option allows you to quickly specify the requirements for an externally viewable format for your slideshow.
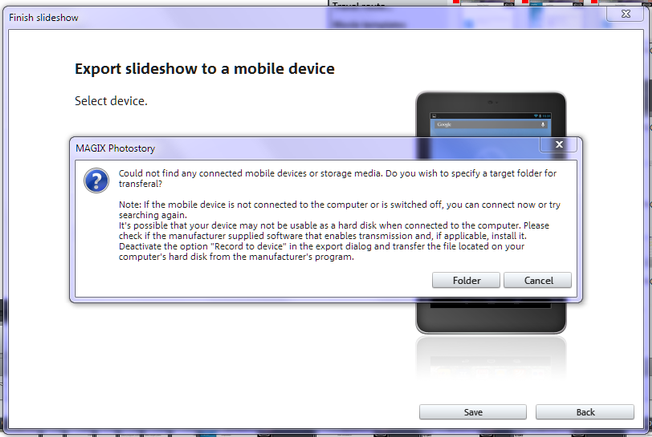
Export to a mobile device
This option allows you to select from a number of pre-defined formats which are optimised for that 'style' of device. When 'saved' the system will render the slideshow appropriately and either save the file to a location on a device (if it is connected) or to a folder on the PC for later upload.
The size of the resulting file will depend on the options the system selected when generating the output, and if saved to the PC the user is required to copy the file to the connected device at their convenience.
Not all mobile devices are listed but each phone or device should be able to play at least one of the generated files.
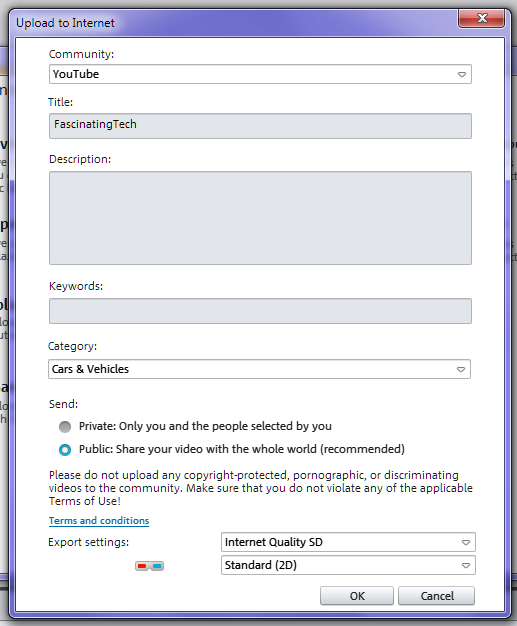
Upload to Internet
This option will render and upload the final slideshow to Facebook, Flikr, YouTube, Magix Online or Showfy if you have the appropriate credentials. Each destination has a set of limited set of options that you can configure (such as YouTube keywords and quality) and provides a quick and easy way to get your files uploaded.
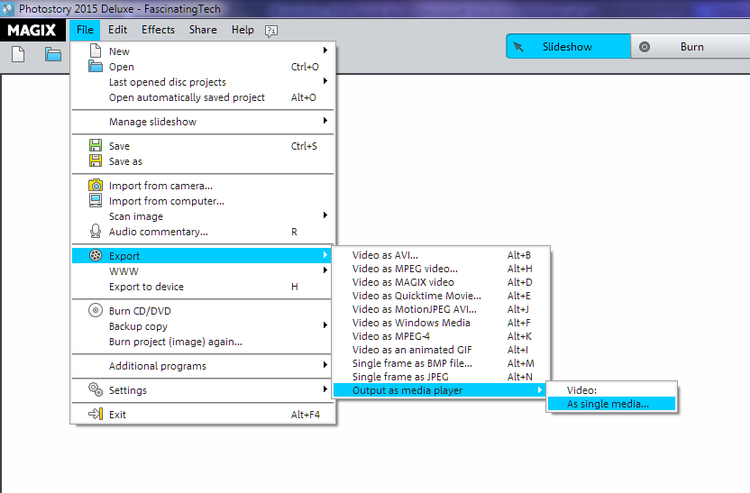
Export - Menu Item
However, for finer grained control of export options, the user can select 'Export' from the main interface and have much greater control over the final output.
The user can export
• AVI
• MPEG 2 \ 4
• Magix format
• Quicktime
• Animated GIF
• A single frame
Some of these options may require the download of an appropriate codec (such as in the case of MPEG-4)
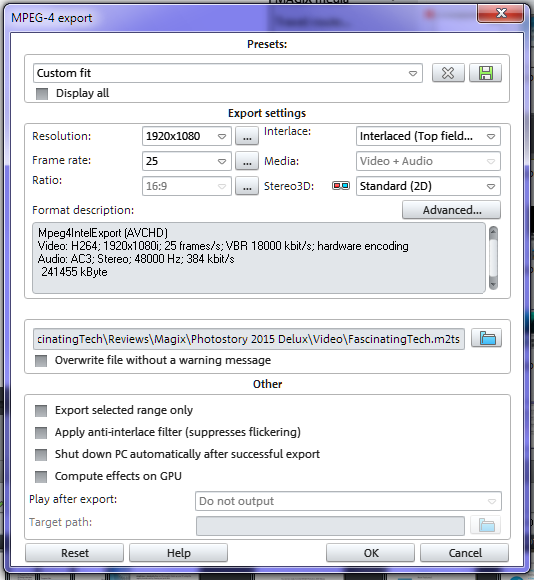
When an export option is selected, the user can then tailor this more via a dialog that is displayed
For example, the MPEG-4 export option allows you to select the output
• Resolution
• Frame rate
• Interlace method
• Compression \ codec used
The Annoyances
When installing the software it offers to install SimpliClean - While this free software may be of use to some people it won't be useful to everyone. The key issue is that it is pre-selected by default (it's an opt-out offer) - If vendors have these offers, please make them opt-in (IE, user has to say 'Yes, install it' via a conscious decision \ act)
It was not clear that additional software will be installed - Music Editor, Print Studio, Photo Designer - Although these again may be welcome applications, or indeed necessary for the smooth running of the main software, It annoys me when these are installed "stealthily" rather than being informed upfront or having it mentioned plainly in the documentation (Photo Designer first appears on page 22 of the user manual as a TIP for example)
When the application first loads it presents a full screen 'Welcome' dialogue that prompts for an initial action - Create new project, Load project etc... If escape is pressed here then the application closes. It would be useful to have the Welcome screen close but leave the main interface open.
When the application launches it may display a 'Magix Software Offering' window which appears on top of EVERY other window you may have open. This is annoying. I typically have a number of applications running concurrently (especially for reviews) and there is no real need to overlay windows on top of these windows... This window has a 'Don't show in future' option which helps.
There appears to be no way to set a default background slide colour. When a slide or title is added, you have the ability to select the background colour and apply it to the slide or all slides... but this affects just those items already in place - not future slides. The next image added appears on a black background. In the example video I produced, I required a white background. As I chopped and changed the slides I needed to change the background colour each time. This may just be an issue due to the workflow I adopted, but a simple 'default slide \ transition colour' option would be welcome.
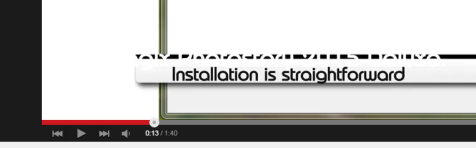
The title text may not fade \ disappear with the caption. This is observable at 13 seconds into the example video I produced where the 'Photostory 2015 Deluxe' text remains when the surrounding caption has disappeared and the 'Installation is straightforward' caption is displayed.
On occasion the text typed into the caption is not immediately reflected in the preview window. When the caption is re-edited and 'Enter' pressed again, the text takes effect.
Pressing 'Escape' when the cursor is in the caption text field deletes the text - Annoying. Ctrl+z returns the field to its original content
Sometimes the playback starts from the beginning of the slideshow rather than where the indicator is set on the timeline. Repeatedly setting the position does not help.
Review Style
This review is intended to highlight the pros and cons of the item under review, not provide details on how to use it. Where notes on use are provided, these are the reviewers observations at the time of review and may not necessarily represent the best, easiest, recommended or proper use of it.
Review images \ videos and capture devices
Where photographs are provided for this review, they were taken by the reviewer unless explicitly stated otherwise. Equipment used could consist of:
Main Camera
• Sony α 580 DSLR \t
• 35mm f/1.8 prime lens
• 18-55mm f/3.5 - f/5.6 zoom lens
• Other lenses and equipment
Imagery and videos
All review images and videos are (c) by me and used on the Fascinating Tech website with my permission. Images for this (and other) reviews can also be found on my personal website at:
Videos can be found hosted on YouTube under my channel
• Box Opening http://youtu.be/zWOVhz1Vr4I
• Example Output http://youtu.be/FHXYaBT0Cdc
Use of imagery, videos and music
If you wish to use any of my review images or videos on another site or in another publication, please contact myself and \ or the editor of Fascinating Tech and wait for permission first.
You may use any other images taken by me and found at knuks.net/finepix for any other purpose so long as:
• it's in accordance with the Creative Commons Attribution, Non-Commercial, Non-Derivative license that is displayed on my web site \ on the Creative Commons web site
• does not place me or the images into disrepute
• they are not used in illegal (UK or readers locale - whichever is less lenient) or questionable publications - I have sole discretion in deciding what is "questionable".
Acknowledgements , Thank-You's and Disclosure
Disclosure
The music found on the example video was arranged by me using Magix Music Maker (2010 I believe) - The music was created about 4 years ago and is subject to the same copyright as the photographs, images and videos for FascinatingTech.com. Use of the music is granted free for use by FascinatingTech. If you wish to use the music for any purpose, please contact myself or the editor of Fascinating Tech first.
